How To Install and Configure Monit
About Monit
Monit is a helpful program that automatically monitors and manages server programs to ensure that they not only stay online consistently, but that the file size, checksum, or permissions are always correct. Additionally monit comes with a basic web interface through which all of the processes can be set up. This tutorial will cover the most basic setup and configuration.
Install Monit
Monit is easiest to install through apt-get:
sudo apt-get install monit
Once monit downloads, you can add programs and processes to the configuration file:
sudo nano /etc/monit/monitrc
Monit can be started up with a command that then keeps it running in the background
monit
Typing monit status displays monit’s details:
The Monit daemon 5.3.2 uptime: 1h 25m

System 'myhost.mydomain.tld'
  status                            Running
  monitoring status                 Monitored
  load average                      [0.03] [0.14] [0.20]
  cpu                               3.5%us 5.9%sy 0.0%wa
  memory usage                      26100 kB [10.4%]
  swap usage                        0 kB [0.0%]
  data collected                    Thu, 30 Aug 2012 18:35:00
Configure Monit
Monit is very easy to use nearly out of the box. By default, it is set up to check that services are running every 2 minutes and stores its log file in “/var/log/monit.log”.
These settings can be altered at the beginning of the configuration file in the set daemon and set logfile lines respectively.
Web Service
Monit comes with it’s own web server running on port 2812. To configure the web interface, find and uncomment the section that begins with set httpd port 2812. Once the section is uncommented, write in your server’s IP or domain name as the address, allow anyone to connect, and then create a monit user and password
set httpd port 2812
    use address 12.34.56.789  # only accept connection from localhost
    allow 0.0.0.0/0.0.0.0        # allow localhost to connect to the server and
    allow admin:monit      # require user 'admin' with password 'monit'
Once this is configured, monit should reload and reread the configuration file, and the web interface will be available:
monit reload
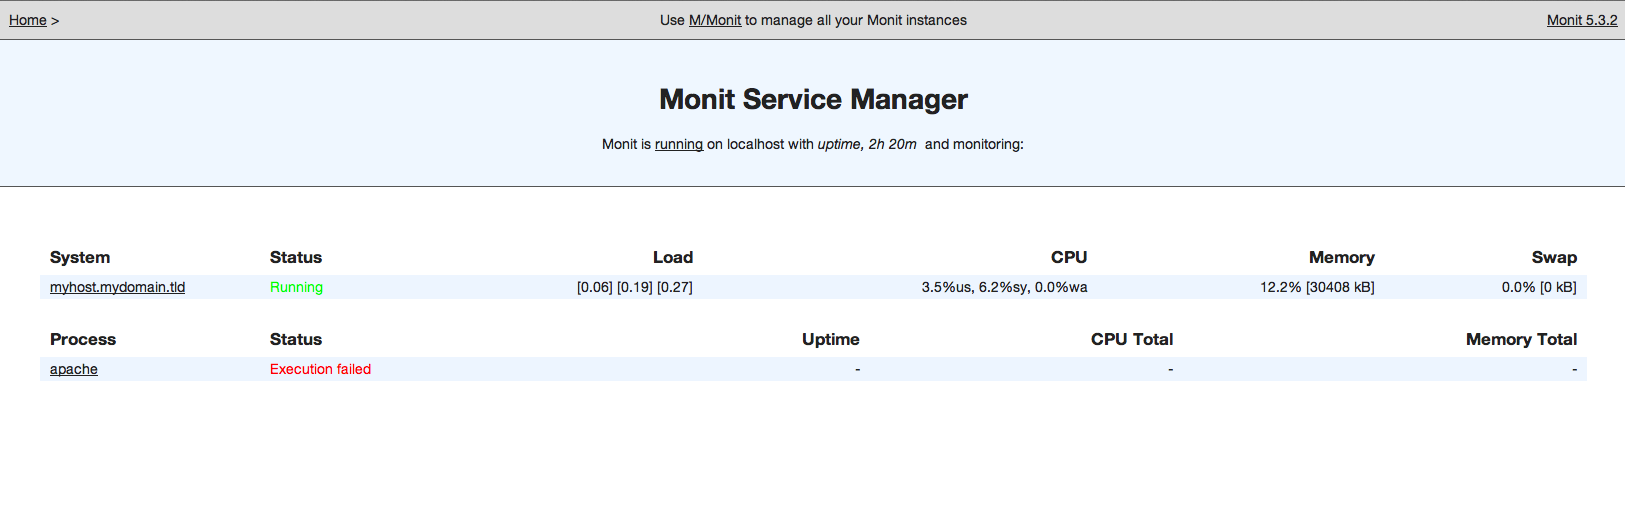
You will then be able to access the monit web interface by going to “example.com:2812”
Login with your chosen username and password. Your screen should look something like this.
Configuring Programs Self-Monitoring
Once the web services are set up, you can begin to input the programs that you want monitored and protected into the "/etc/monit/monitrc" configuration file. To simply ensure that programs stay online, you can use the /etc/init.d commands to stop or start a program.
Here are some example configurations:
Apache:
check process apache with pidfile /run/apache2.pid
    start program = "/etc/init.d/apache2 start" with timeout 60 seconds
    stop program  = "/etc/init.d/apache2 stop"
MySQL
check process mysqld with pidfile /var/run/mysqld/mysqld.pid
    start program = "/etc/init.d/mysql start"
    stop program = "/etc/init.d/mysql stop"
Nginx
check process nginx with pidfile /var/run/nginx.pid
    start program = "/etc/init.d/nginx start"
    stop program = "/etc/init.d/nginx stop"
Finish Up
Once you have configured all of the programs that you want to run, they will be automatically tracked and restarted should they turn off.
You can control the programs through both the web interface or the command line.
Once you have set up the configuration, check the syntax:
monit -t
After resolving any possible syntax errors, you can start running all of the monitored programs.
monit start all

58 Comments