How To Set Up Shiny Server on Ubuntu 14.04
Introduction
Shiny is an R package that allows users to convert R code into an interactive webpage. Shiny server is a server provided by RStudio that can be used to host and manage Shiny applications on the web. Other than hosting Shiny applications, Shiny Server can also host interactive R markdown documents. Shiny Server has both a free open source version and a paid professional version that includes more features.
In this guide, we will learn how to set up the open source Shiny Server on a DigitalOcean Droplet running Ubuntu 14.04. If your Droplet is running a different version of Ubuntu or a different Linux distribution, most of the instructions will still apply, but you may need to modify some of the commands to match your specific distribution. You can also use this guide to set up Shiny Server Professional. Following this guide to completion should take about 10-15 minutes.
Prerequisites
For this tutorial, you will need:
- Ubuntu 14.04 Droplet with 2 GBs of RAM
- The latest version of R installed on the Droplet (How To Set Up R on Ubuntu 14.04)
- A non-root user with sudo privileges (Initial Server Setup with Ubuntu 14.04 explains how to set this up.)
All the commands in this tutorial should be run as a non-root user. If root access is required for the command, it will be preceded by sudo. Initial Server Setup with Ubuntu 14.04 explains how to add users and give them sudo access.
Note: for the remainder of this guide, whenever you see yourserverip, you need to replace it with your Droplet's IP.
Step 1 — Installing Shiny
Before installing Shiny Server, we need to install the shiny R package. We will install shiny in a way that will make it available to all users on the server.
- sudo su - -c "R -e \"install.packages('shiny', repos='http://cran.rstudio.com/')\""
Note: if you're familiar with R, you might be tempted to install packages directly from R instead of from the command line. The approach used here is the safest way to ensure the installed package gets installed for all users and not just for the user currently running R.
Step 2 — Installing Shiny Server
We're going to install Shiny Server with the GDebi tool, so first we need to install it.
- sudo apt-get install gdebi-core
Now we're ready to download Shiny Server. Assuming your droplet is running 64-bit Ubuntu, use the following command to download Shiny Server.
- wget -O shiny-server.deb http://download3.rstudio.org/ubuntu-12.04/x86_64/shiny-server-1.3.0.403-amd64.deb
This will download Shiny Server version 1.3.0.403, which is the most up-to-date Shiny Server at the time of this writing. If you want to download the newest version, you can consult the official Shiny Server download page to find the latest version and change the URL accordingly. If you're running a 32-bit operating system or a non Ubuntu distribution, you may need to consult the Shiny Server download page for specific instructions for your operating system.
Now use GDebi to install the file that was downloaded.
- sudo gdebi shiny-server.deb
Shiny Server should now be installed and running on port 3838. You should be able to see a default welcome screen at http://your_server_ip:3838/.
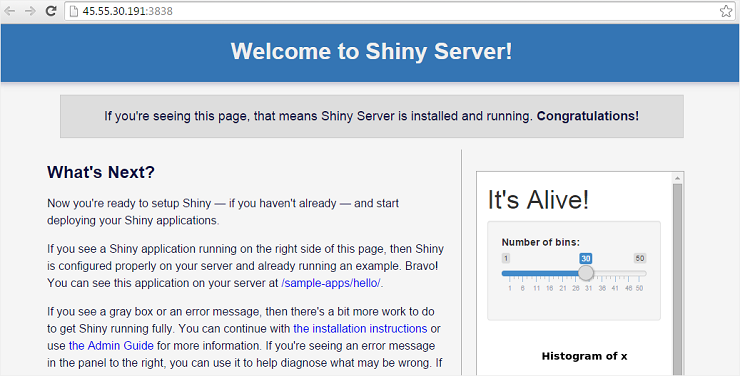
You can make sure your Shiny Server is working properly by going to http://your_server_ip:3838/sample-apps/hello/.
Step 3 — Hosting Interactive R Markdown Documents
Shiny Server is useful not only for hosting Shiny applications, but also for hosting interactive R markdown documents. You can learn more about interactive R markdown documents on RStudio's official Rmarkdown site.
At this point you should have a working Shiny Server that can host Shiny applications, but it cannot yet host interactive R markdown documents because the rmarkdown R package isn't installed. Shiny Server comes with a sample interactive document that is available at http://your_server_ip:3838/sample-apps/rmd/. If you go to that URL right now, you will see an error.
Let's install the rmarkdown package to fix that.
- sudo su - -c "R -e \"install.packages('rmarkdown', repos='http://cran.rstudio.com/')\""
Now Shiny Server is set up to run interactive R markdown documents as well as Shiny applications. To verify that interactive documents work, go to http://your_server_ip:3838/sample-apps/rmd/ and ensure there is no error.
Step 4 — Installing Shiny Server Professional (Optional)
Only perform this step if you have purchased a Shiny Server Professional license and would like to use the license on this server.
After purchasing the license, RStudio will give you a URL to use to download the Shiny Server Pro file. Download the Shiny Server Pro file.
- wget -O shiny-server-pro.deb Shiny_Server_Pro_URL
Install Shiny Server Pro.
- sudo gdebi shiny-server-pro.deb
You will also be given a Product Key that will be required to activate Shiny Server Pro.
- sudo /opt/shiny-server/bin/license-manager activate Product_Key
Restart Shiny Server Pro so that the activated version will get started.
- sudo reload shiny-server
Next Steps
You now have a functioning Shiny Server that can host Shiny applications or interactive documents. The configuration file for Shiny Server is at /etc/shiny-server/shiny-server.conf. By default it is configured to serve applications in the /srv/shiny-server/ directory. This means that any Shiny application that is placed at /srv/shiny-server/app_name will be available to the public at http://your_server_ip:3838/app_name/.
It's a good idea to have a look at the Shiny Server Administrator's Guide to learn how to customize the server to your exact needs and how to manage it.
To learn more about writing Shiny applications, read the tutorials on rstudio.com.
To learn more about writing interactive R markdown documents, check out the R Markdown page on rstudio.com.
Conclusion
In this guide, we went through the steps required to set up Shiny Server on an Ubuntu 14.04 Droplet. By setting up Shiny Server, we are able to host Shiny applications and interactive R documents on the web in a way that is accessible to the public.

9 Comments